Create an endpoint
- Web
- REST API
To create a new Serverless endpoint through the Runpod web interface:
- Navigate to the Serverless section of the Runpod console.
- Click New Endpoint.
- On the Deploy a New Serverless Endpoint screen, choose your deployment source:
- Import Git Repository (if GitHub is connected) (see Deploy from GitHub for details.
- Import from Docker Registry (see Deploy from Docker for details.
- Or select a preconfigured endpoint under Ready-to-Deploy Repos.
- Follow the UI steps to configure your selected source (Docker image, GitHub repo), then click Next.
- Configure your endpoint settings:
- Endpoint Name: The display name for your endpoint in the console.
- Endpoint Type: Select Queue for traditional queue-based processing or Load balancer for direct HTTP access (see Load balancing endpoints for details).
- GPU Configuration: Select the appropriate GPU types and configure worker settings.
- Model: (Optional) Enter a model URL from Hugging Face to optimize worker startup times. See Pre-cached models for details.
- Container Configuration: Edit the container start command, specify the container disk size, and expose HTTP/TCP ports.
- Environment Variables: Add environment variables for your worker containers.
- Click Deploy Endpoint to deploy.
https://api.runpod.ai/v2/{endpoint_id}/) that you can use to send requests. For information on how to interact with your endpoint, see Endpoint operations.
Edit an endpoint
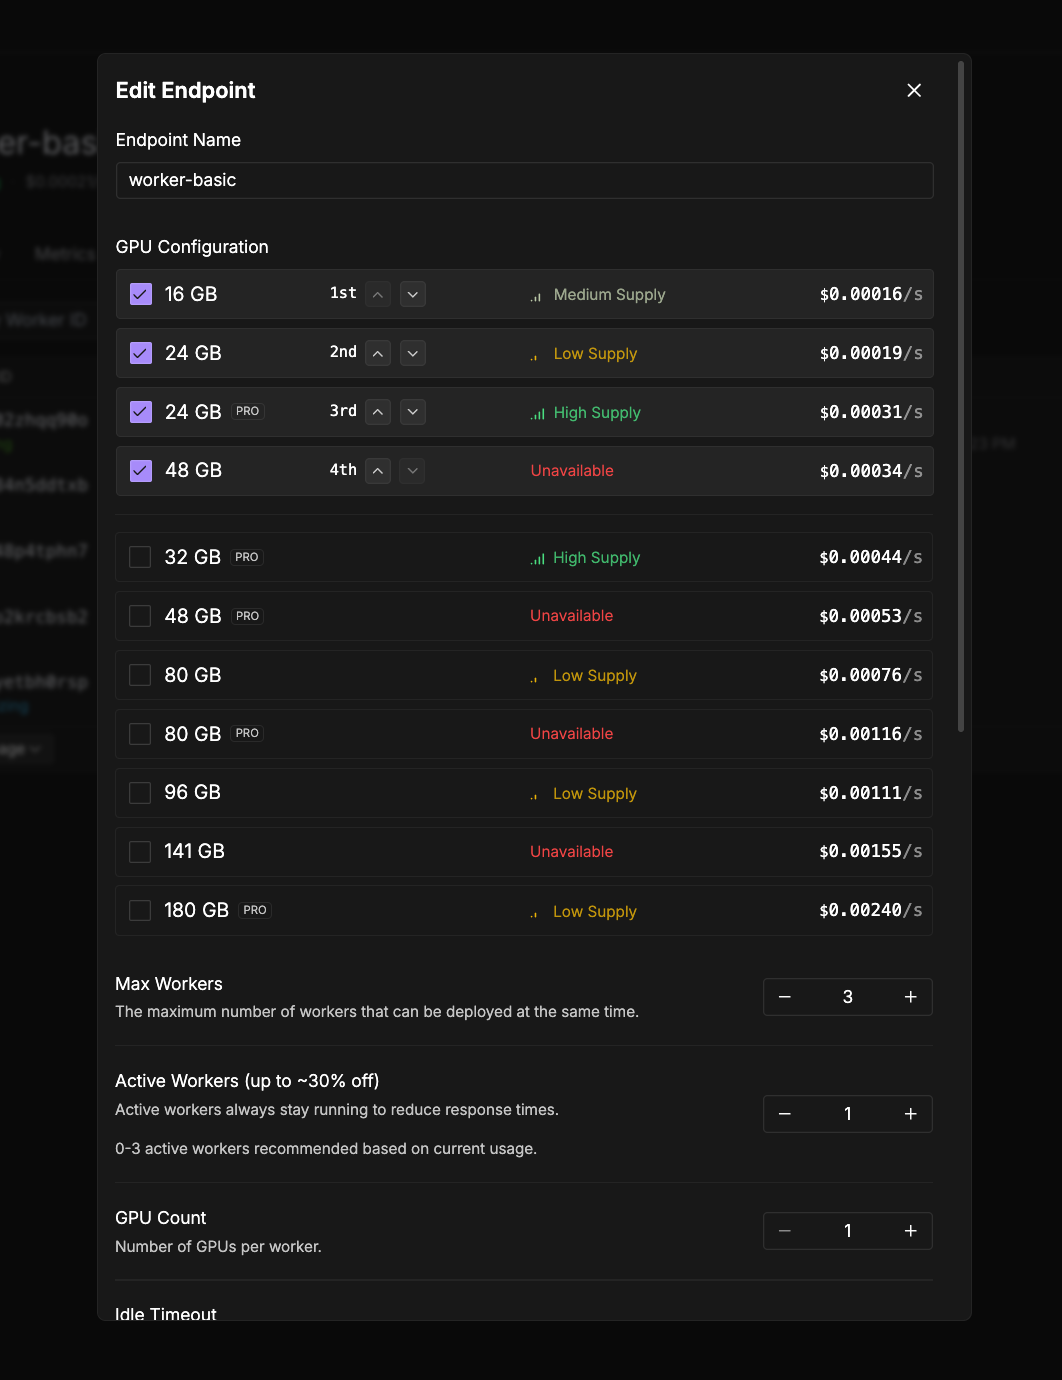
- Navigate to the Serverless section in the Runpod console.
- Click the three dots in the bottom right corner of the endpoint you want to modify.
- Click Edit Endpoint.
-
Update any configuration parameters as needed:
- Endpoint name
- Worker configuration
- Docker configuration (container image or version)
- Environment variables
- Storage
- Click Save Endpoint to apply your changes.
Delete an endpoint
When you no longer need an endpoint, you can remove it from your account:- Navigate to the Serverless section in the Runpod console.
- Click the three dots in the bottom right corner of the endpoint you want to delete.
- Click Delete Endpoint.
- Type the name of the endpoint, then click Confirm.
Attach network volumes
Attach persistent storage to share data across workers:- Navigate to the Serverless section in the Runpod console.
- Click the three dots in the bottom right corner of the endpoint you want to modify.
- Click Edit Endpoint.
- Expand the Advanced section.
- Select one or more volumes from the dropdown below Network Volumes.
- Click Save Endpoint to attach the volumes to your endpoint.
/runpod-volume on each worker, making them ideal for sharing large models, datasets, or any data that needs to persist across worker instances.
When you attach multiple network volumes to an endpoint, workers are distributed across the datacenters where those volumes are located. Each worker is attached to exactly one network volume based on its assigned datacenter.
To learn more about how storage works in Serverless, see Storage options.
Best practices for endpoint management
- Start small and scale: Begin with fewer workers and scale up as demand increases.
- Monitor usage: Regularly check your endpoint metrics to optimize worker count and GPU allocation.
- Use GPU prioritization: Set up fallback GPU options to balance cost and availability.
- Leverage network volumes for large models or datasets rather than embedding them in your container image.
- Set appropriate timeouts based on your workload’s processing requirements.